

Skupaj: €0,00
Davki in poštnina se izračunajo na blagajni

Next up in our series of laboratory techniques (if you haven’t already, check out our PCR and PCR primers blogs) is another standard laboratory technique, you will definitely need to use during your time in the lab. It is used in various research fields, from chemistry, biochemistry to molecular biology.
ALERT: Before you start, make sure you have good protective equipment!
First, let’s break down the principle behind this widely used method. The basic principle of agarose gel electrophoresis relies on charged particles moving through an agarose gel. The electricity pulls the negatively charged DNA or RNA towards the positive electrode. Before the fragments reach the positive electrode, they have to overcome an obstacle course that is presented by the agarose gel matrix. Shorter DNA fragments will be faster than longer ones because they migrate faster through the matrix. The longer fragments are more negatively charged, but they experience more friction which slows them down. Alongside your samples, you can’t forget to run a collection of fragments of known lengths, known as a ladder. This will help you determine the lengths of your fragments at the end of the run!
As you can see one of the applications of using gel electrophoresis is the visualization of your DNA or RNA product. It can be used to check if your cloning was successful via control digestion, or if your colonies are what you expected after your colony PCR run. After the gel electrophoresis is done, the fragments can be further used for purification or for further use in PCR.
All in all, agarose gel electrophoresis is a powerful method for separating and analysing DNA and RNA fragments based on size!

The gel is made of agarose as the name of the method reveals. Agarose is a neutral polysaccharide. Having a neutral gel is crucial so there are no impurities and charges interfering with the DNA journey through the gel. The commonly used Agarose gels concentrations vary from 0.7% to 2% depending on the size of bands you need to separate. The most standard agarose gel concentration is 1%. The gel is prepared by weighing the required mass of agarose for the desired concentration. Agarose is then mixed with the TAE or TBE buffer (see below: Composition, pH, and concentration of the buffer) and heated up until it completely dissolves. For example: to make a 1% agarose gel mix 1g of agarose in 100 mL of TAE/TBE buffer.
Hands-on tip: To save time you can already add EtBr to the agarose gel before pouring it into the gel tray. EtBr binds to the DNA and under UV light you can visualize the bands.
When you have prepared the agarose, you need to pour the gel into the gel tray. Don’t forget to add the tray comb, so you have wells in the gel to pipette your samples in later on! If you pour slowly, you will get fewer bubbles that will disrupt your gel. If you do get them, simply use a pipette tip to move them to the edge. Before continuing let the gel sit at room temperature for 30 minutes, until it has solidified. If you are in a hurry you can put the gel in the fridge for 10-15 minutes.
Next, the electrophoresis gel is put into a buffer-filled power box to create an electric gradient running through the gel. The power box is hooked up to a negative (cathode) and a positive (anode) electrode. The negative electrode has a standardized black colour and is plugged in at the top, where the samples are loaded. The positive end of the gel has a positive red electrode. When you turn on the power this generates a – charged top of the gel and a + charged bottom of the gel.
Hands-on tip: when setting up a gel always remember Run to Red! So the DNA will run in the right direction through the gel and not escape off the gel.
DNA has a negatively charged backbone, thanks to phosphate. As opposites attract, the negatively charged DNA molecule will be attracted to a positively charged part of the gel.
DNA samples are mixed with a loading buffer, containing a tracking dye and glycerol when loaded into the wells in the agarose gel. The main purpose of the loading buffer is to provide a visible dye for lading samples and to track how far in the gel the DNA has moved. The loading buffer contains a high percentage of glycerol, which weighs down the sample preventing it from floating and diffusing into the buffer.
Before turning on the power and letting the gel electrophoresis run, do not forget to add a molecular weight ladder into the first well of the gel. The ladder contains linear double-stranded DNA fragments of known sizes. This will serve you for interpreting the results and comparing the sizes of the bands to the sizes of the ladder.
Now everything is set up and you are ready to turn on that power supply! Only turn on the power supply once the power box is closed and the gel is inside. The typical power at which you run the gel is 80-150 V. The gel acts as an obstacle course for DNA fragments, also known as bands. Bigger DNA fragments are clumsier and get tangled up in the gel more, while the smaller fragments are more flexible and can jump over obstacles faster. This results in smaller DNA fragments being closer to the bottom and bigger DNA fragments closer to the top, where the sample loaded wells are.
While the gel is running you will see a set of bands. These bands are just the tracking dye letting you know how far the gel’s run. Let the experiment run until the dye line is more than halfway down the gel.

Do not panic when you see the gel without different bands, the experiment is not over just yet! DNA fragments won’t be visible until you dye them with a fluorescent dye, such as ethidium bromide (EtBr). They’ll only show up once the UV spotlight is on them!
To save time you can already add EtBr before to the agarose gel and the buffer. EtBr binds to the DNA and under UV light you can visualize the bands. If you did not add EtBr to the gel and buffer you will need to place the gel on a rocker for 20-30 minutes with an EtBr solution and then rinse it with water before imaging.
You can change the gel matrix density (meshiness) by changing the agarose concentration. 1% is good for separating pieces that are 400-8,000 nucleotides long. You can decrease the concentration to make bigger pores better for separating bigger pieces or increase the concentration to get smaller pores better for separating smaller pieces. Agarose gels are commonly prepared in concentrations between 0.7 and 2.0%. depending on the size of the bands that need to be separated. If the bands you expect to see on the gel are close in size, try adjusting the agarose concentration of the gel to get clearer separation of the bands. Agarose percentage determines the size of the pores in the gel matrix.
Short DNA = higher agarose concentration to reduce the size of the matrix pores.
Long DNA = lower agarose concentration to increase the size of the matrix pores.
For gel electrophoresis, either TBE (Tris-borate-EDTA) or TAE (Tris-acetate-EDTA) buffers can be used.
The difference between TAE and TBE buffer is in their composition. The main composition in TBE is boric acid, whereas TAE buffer contains acetic acid. The purpose of these weak acids is to provide the proper ion concentration while nucleic acids move through the agarose matrix. Since they are buffers, their job is to maintain constant pH and ion concentration during electrophoresis. Maintaining the pH of the solution is important because the changes in pH affect the net charge of the nucleic acids. Meaning, if the pH is within the desired range, the net charge stays the same and the nucleic acids move properly. Both TBE and TAE buffer contain EDTA, which prevents nuclease from degrading the nucleic acids.
Even though it might seem there are no practical differences between the two, there are some considerations to make when choosing one or the other.
When to choose TBE buffer?
When to choose TAE buffer?
Another important thing to note when running gel electrophoresis is to ALWAYS use the same buffer in the box as you used to prepare the gel! Mixing different buffers or using water is a big no-no.

The higher the purity of the DNA in the samples, the better the resolution in the gel will be. If the DNA concentrations in your samples are high, try diluting your sample with Milli Q water. In cases with high DNA concentrations, bands can appear bolder and the separation of smaller fragments can be blurred due to DNA overload. To achieve better resolution of the sample try loading less DNA into the wells (100-150ng).
The optimal voltage to run the gel is from 80 - 150 V until the tracking dye has travelled approximately 70-80% of the gel, depending on the fragment sizes. Higher voltages can cause the gel to melt due to heating up. Usually, the time needed to run the gel runs between 1 and 1.5 hours. If you are really trying to get those clear bands to put in your thesis or report, try to increase the resolution by running the gel longer at a lower voltage.
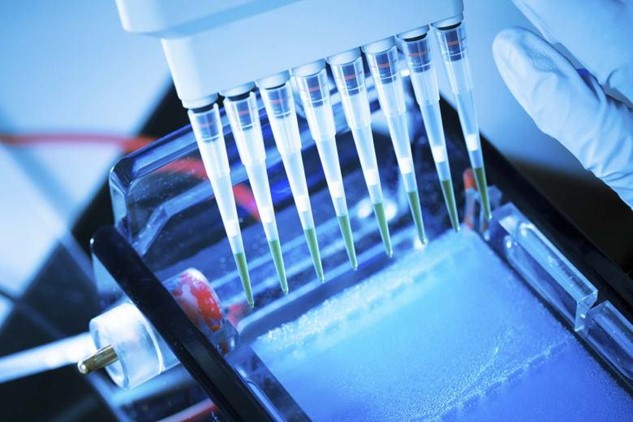
Loading the samples in the wells can sometimes be tricky. You need to maintain a positive pressure with the pipette, so the sample does not float out of the well. Also, try to avoid making bubbles. A bit of the sample volume can always be lost when pipetting, so try to follow the 10% rule. This rule means that each sample makes 10% more volume than needed.
Do not forget to add the molecular weight ladder and to mark where you put your samples to avoid confusion when analysing the results.


